

How To Install Self Adhesive Vinyl Wallpaper
I love doing projects with my mom. We drinkable wine and catch up as we work abroad. Plus, she has the same attitude that I accept when doing DIY projects…done is better than perfect. Today'south project was a great example of how we practice that motto.
A few weeks ago, we installed peel and stick wallpaper in my mom's guest room closet. It turned out and then beautiful, but it certainly isn't perfect. Since this was our commencement time wallpapering, we learned A LOT along the way. Simply we got 'er done with just a few tiny bubbles in the paper and the closet looks pretty damn practiced.
The Guest Room Closet

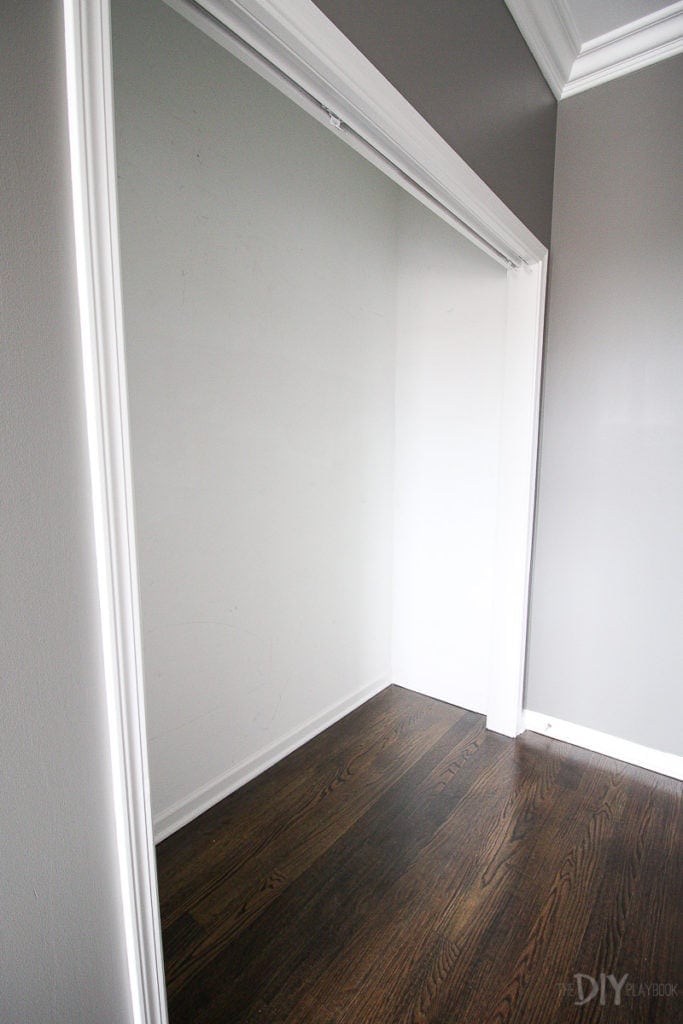
My mom's invitee room cupboard wasn't super functional before. Information technology was just a long rod and one shelf above. She stored lots of random items in this closet, like her Christmas tree, extra chairs, and stuff for her grandkids. Now that Finn and I are her roomies, we knew that we would need to make the cupboard a bit more functional for all of our clothing and shoes while we stay hither. So that's why we decided to tackle this closet and get in a whole lot better!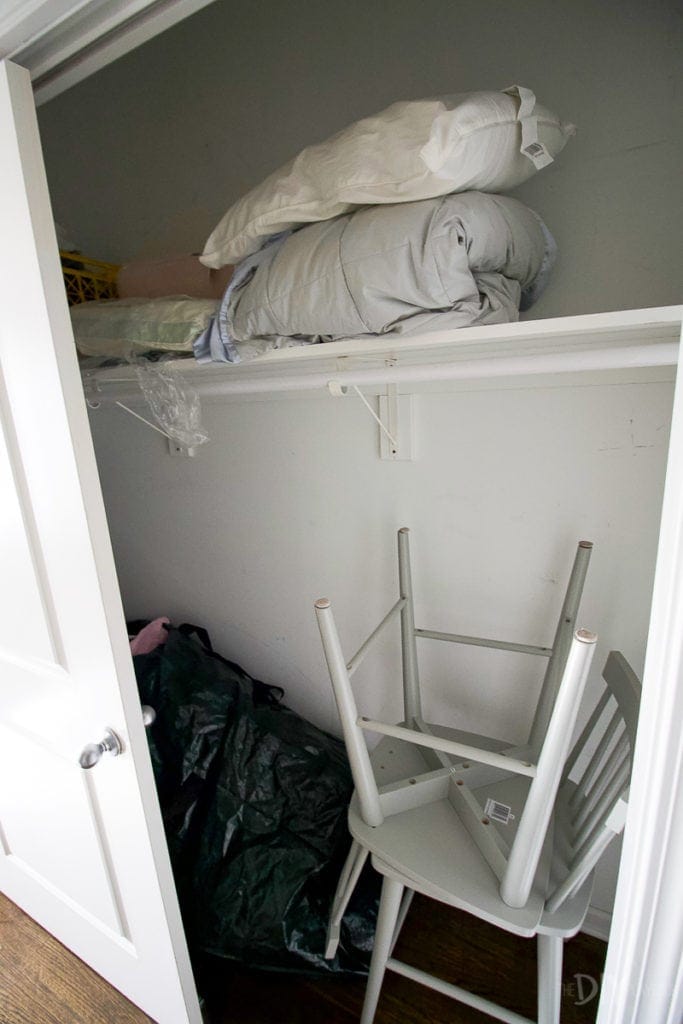
While I knew we needed to install a new closet system system (more than details on that side by side calendar week), I also felt like it needed some personality and a feminine touch to match the rest of my mom's gorgeous identify. That's when I had the idea to find a really pretty wallpaper for the back of the closet. When I stumbled upon this peel and stick wallpaper, I was sold! I figured peel and stick wallpaper was a skilful manner to tiptoe into this new-to-me projection, since I wasn't quite prepare to utilize "existent wallpaper." Plus, I loved the bold color and cute blueprint.
Tips to Install Peel and Stick Wallpaper
As I mentioned, we learned SOOOO MUCH as we tackled this projection. So while I'm non an expert, I'll certainly share what NOT to do as y'all install your ain peel and stick wallpaper. My kickoff slice of advice is to start small and tackle this project in a place similar a closet. We kept saying, "at to the lowest degree it'southward just a closet" whenever a section wasn't totally perfect. And it's so true! If you want to tackle this project in a prominent spot, I'd recommend practicing in a smaller infinite first to get the hang of information technology.
Project Supplies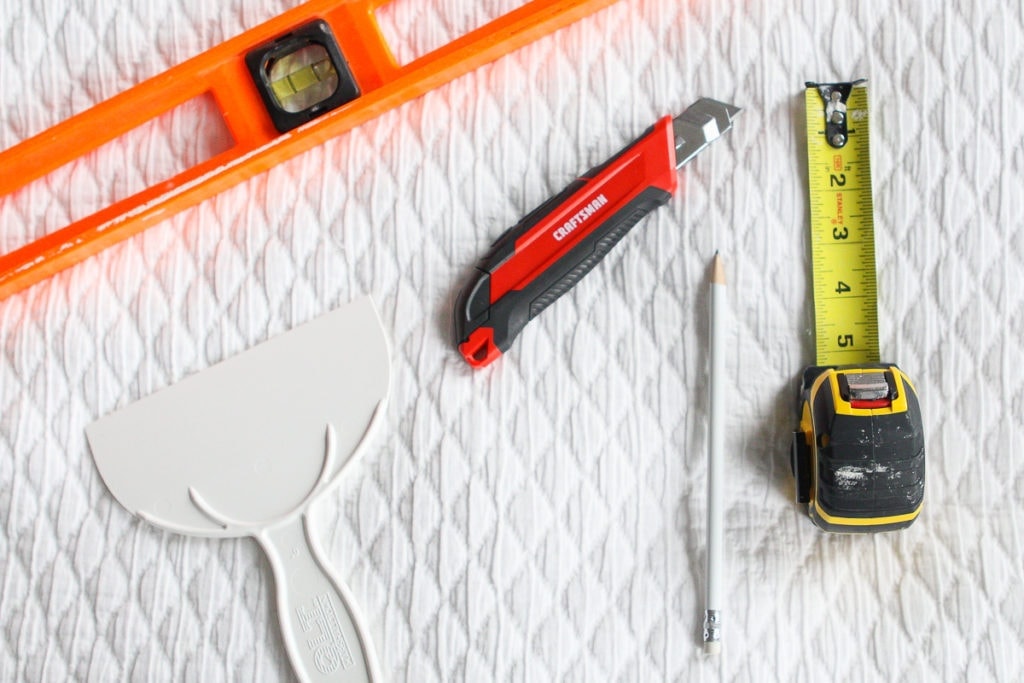
- Skin and Stick Wallpaper (make sure to purchase extra, you can always return it!)
- Tape Mensurate
- Pencil
- Level
- Straight Edge
- Utility Knife
- Plastic Smoother
- Ladder

Prepping for Wallpaper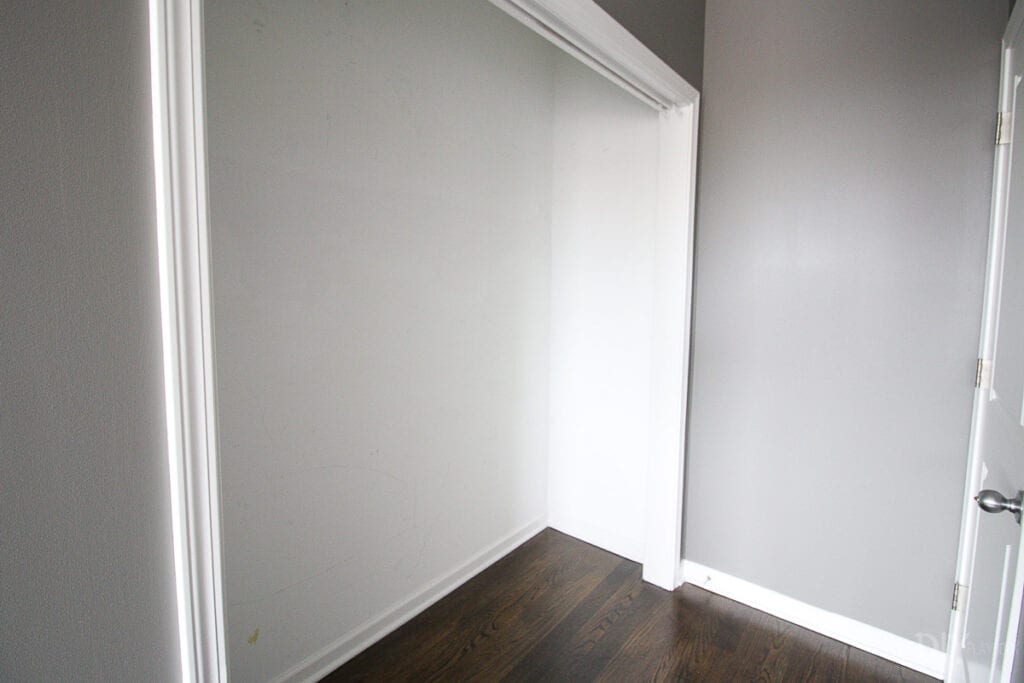
The first thing nosotros did was really nigh a calendar month ago. Nosotros removed the old closet arrangement, patched the holes, and primed the entire closet. You desire the paint to fully cure before yous employ the peel and stick wallpaper or else information technology might not adhere correctly. We also removed the doors, which is an absolute must when working in tight quarters!
Mark a Guide Line
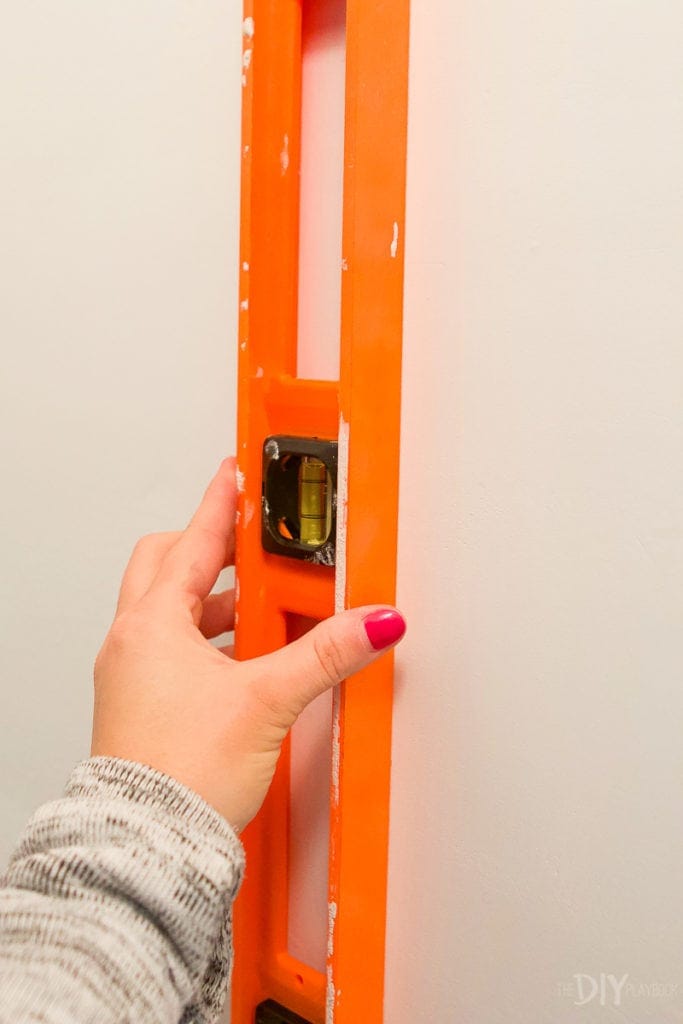
We started on the left side of the closet, worked our manner correct, and then did the sides. So the first step was to measure out from the left corner 20.5 inches (the width of the wallpaper). I then used a long level to draw a straight line the entire length of the wall. This was the guide for our starting time strip, and so it needed to be perfectly direct.
Install The First Strip

Peel about 12 inches of the bankroll off the paper and start at the ceiling. You'll want to get out a piddling extra on the superlative of the ceiling (y'all'll trim it after). Line up the right side of your paper with your straight line.
I tin't emphasize plenty how important it is that y'all install this first strip, direct, post-obit your marker on the wall. This strip will make or break your entire projection…seriously! Don't worry about it lining upwardly perfectly in the corner. Instead, make sure it's admittedly straight along that marker. I think our commencement strip was a teeny tiny bit off and we and so ran into some problems down the line. Acquire from us and take the fourth dimension to get this one merely right!
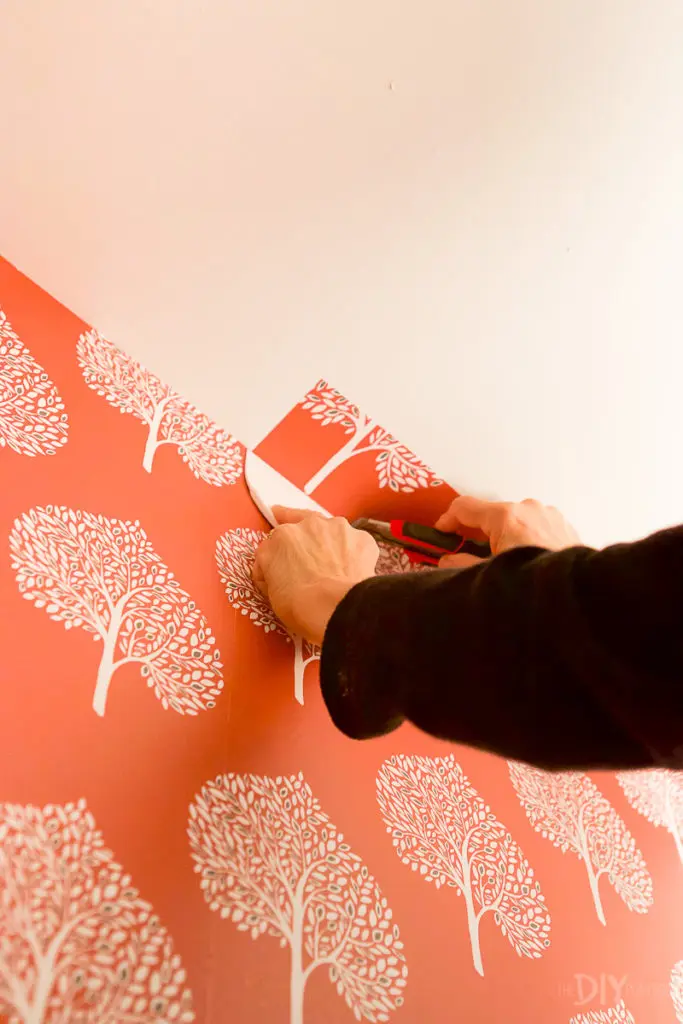
Smooth & Trim

The plastic smoother was the number one tool for this project. As you press the wallpaper onto the wall, you'll movement from acme to lesser peeling the back off and using the smoother to push any air bubbles downwards. 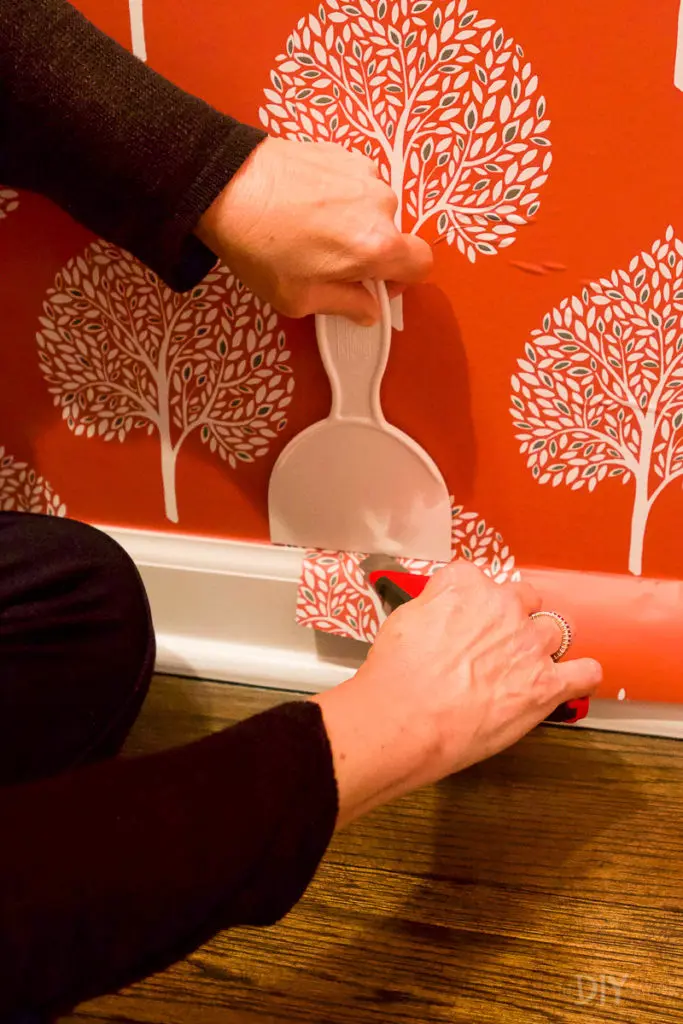
When y'all get to the floor, use the plastic smoother as your guide and run the utility knife along the edge of the baseboard to trim it. Practice this same technique on the ceiling to trim the excess. Then go over the entire piece one more time making sure all of the air bubbles are out and it's pressed firmly onto the wall.
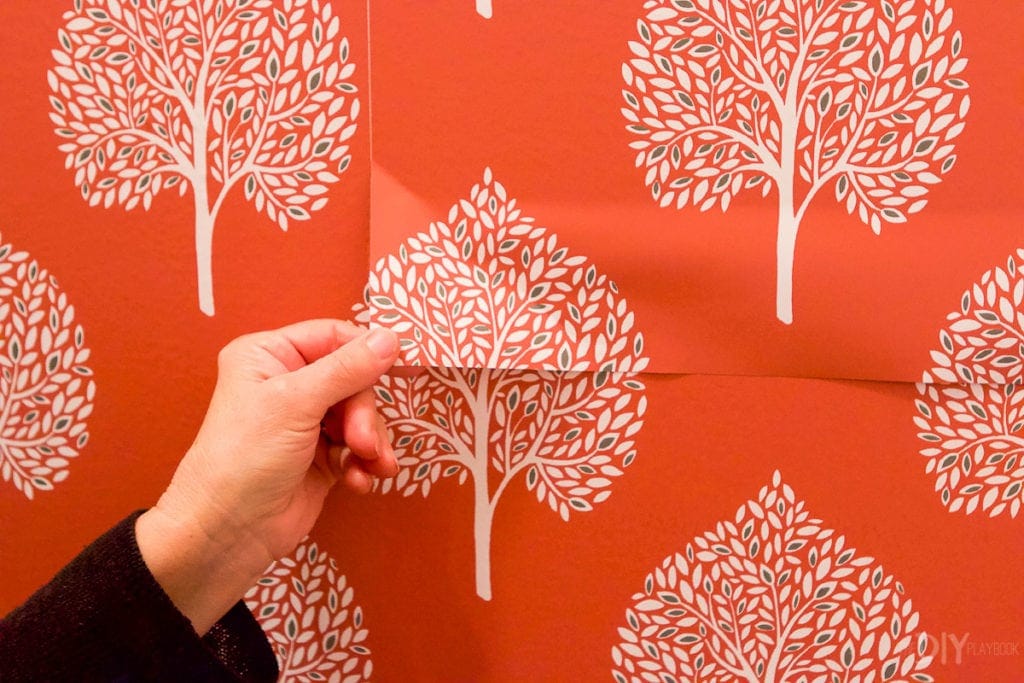
Apply More than Strips
Follow the same techniques to install your second strip. Match the pattern up exactly and utilize that as your guide so you know it's straight. The great thing about peel and stick wallpaper is that y'all can hands elevator it dorsum up and readjust information technology as you go. So if information technology's not lining up perfectly, just unpeel information technology and starting time over again. This was a gamechanger for the states and immune us to reposition to become everything matched up.
Starting a New Roll
There were a couple of areas where we ran out of wallpaper before we got to the bottom of the wall. In those instances, we opened a new ringlet and matched the pattern on the bottom of the strip, equally well as to the left piece. We would cutting the new piece and then place it a couple of inches underneath the bottom of the top piece.
We were worried you'd be able to see all of the lines, but in one case y'all smooth it into place the lines pretty much disappear. The pattern usually helps to hibernate any imperfections.
Wallpaper The Sides
When we got to the correct side, we ended up curving the peel and stick wallpaper into the corner instead of cut it. This made the corner disappear, creating a seamless look. We and so started the next piece on the right wall following the pattern of the 1 to the left. On the left side wall, nosotros ended up overlapping the design a flake with the back wall to ensure that no white wall showed through in the corner. 
Information technology took us virtually three hours to finish up this closet, only nosotros were having a smash catching up and drinking wine while we worked (plus, we took a break for some dinner in there too). I think next time we practice this project, we can get it washed a bit faster!
Before & After

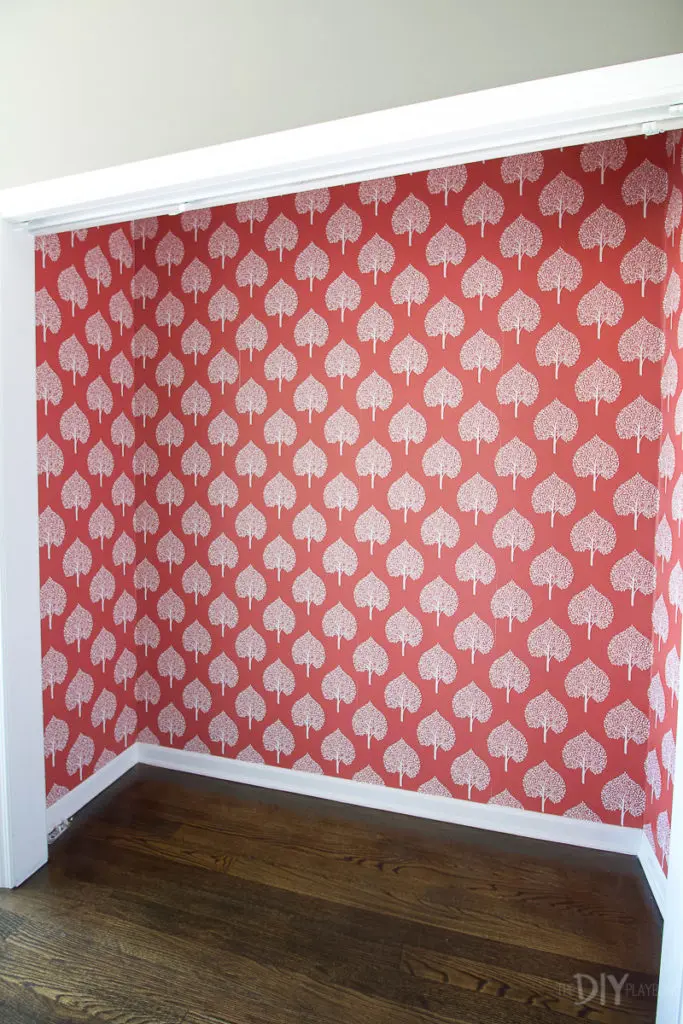

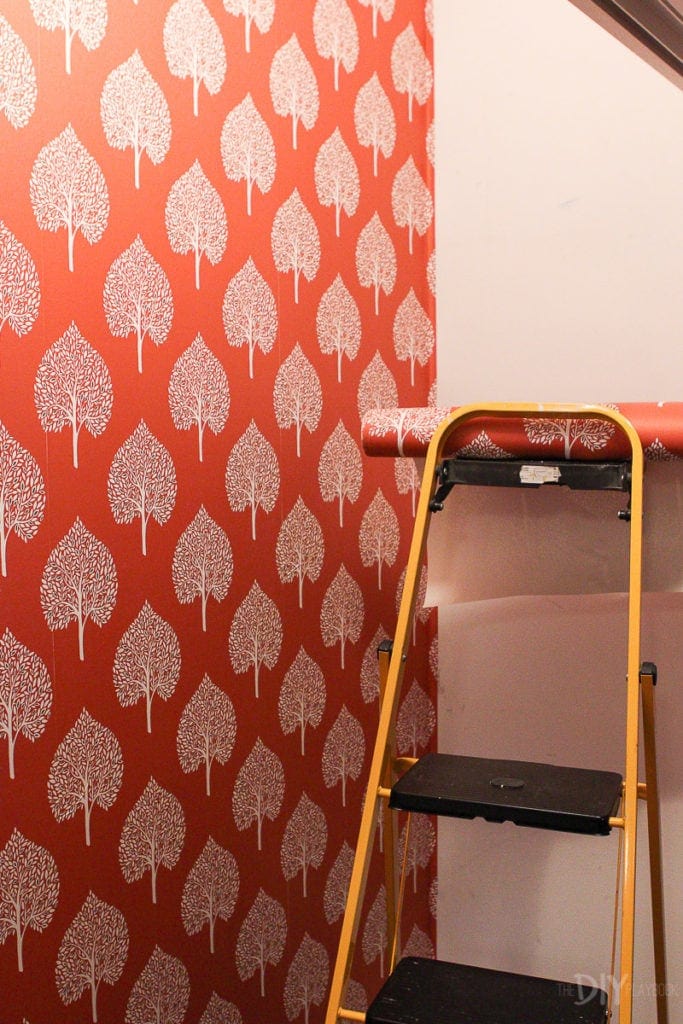
I now want to wallpaper all the things! I mean, c'mon, this closet looks and then much cooler now with that pop of color. Before it was a dingy white and now it'due south got and then much personality. 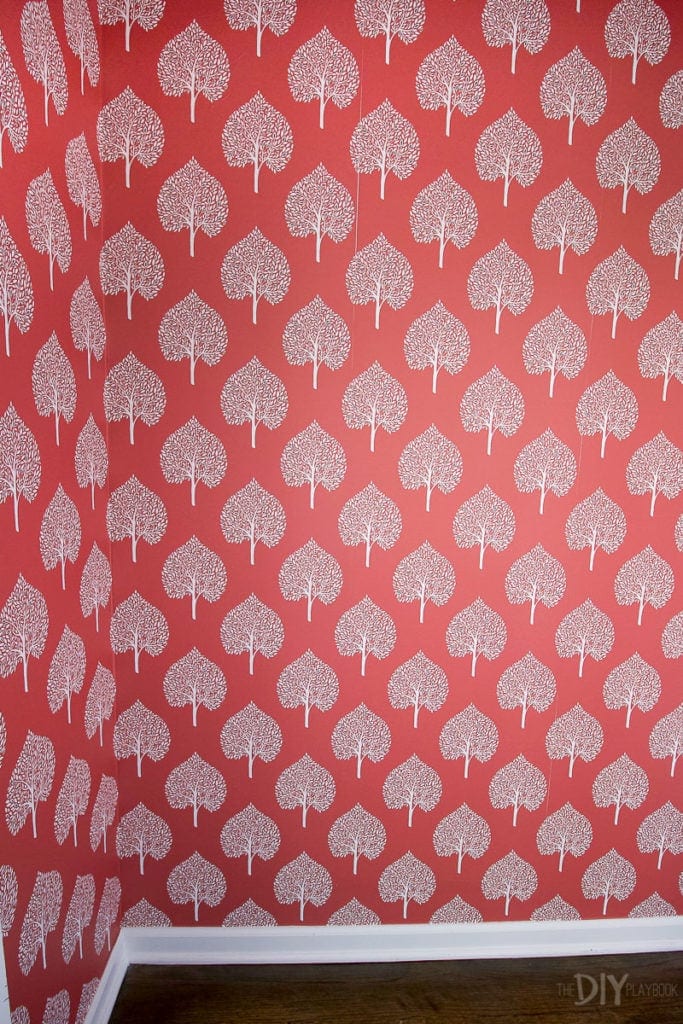
Plus, the blueprint is so pretty and feminine…simply similar my mama. 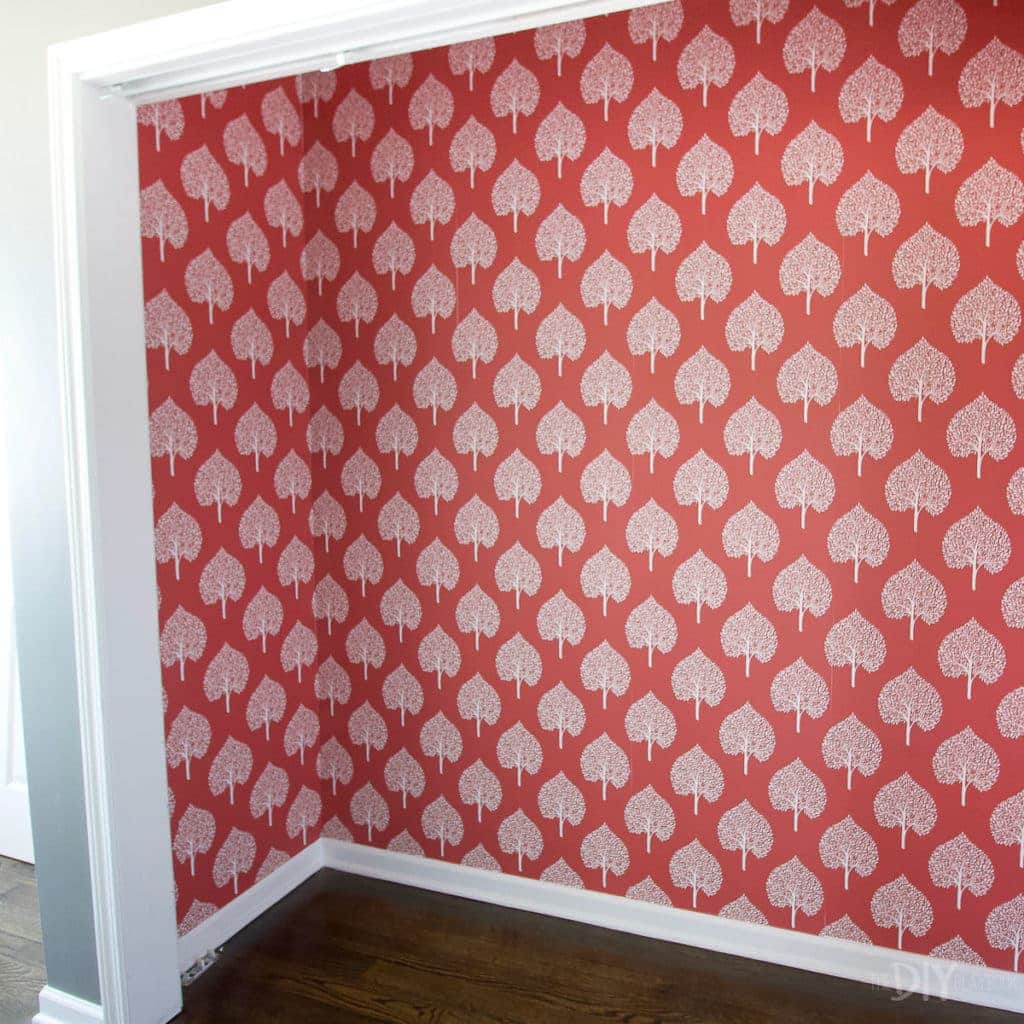 I will admittedly tackle this project again in the new house. I'g already plotting out our forepart cupboard. I mean, wouldn't information technology be special to take a fun color in your cupboard every bit your guests hang up their coats? The ultimate fashion to welcome people into your home! Plus, I learned so much installing information technology the first time, that it should be a breeze next time I practise this project. Hopefully, I tin can convince my mom to help me again!

And here's a await at the finished closet! You can come to see the procedure of adding the closet organizers over in this web log mail service. 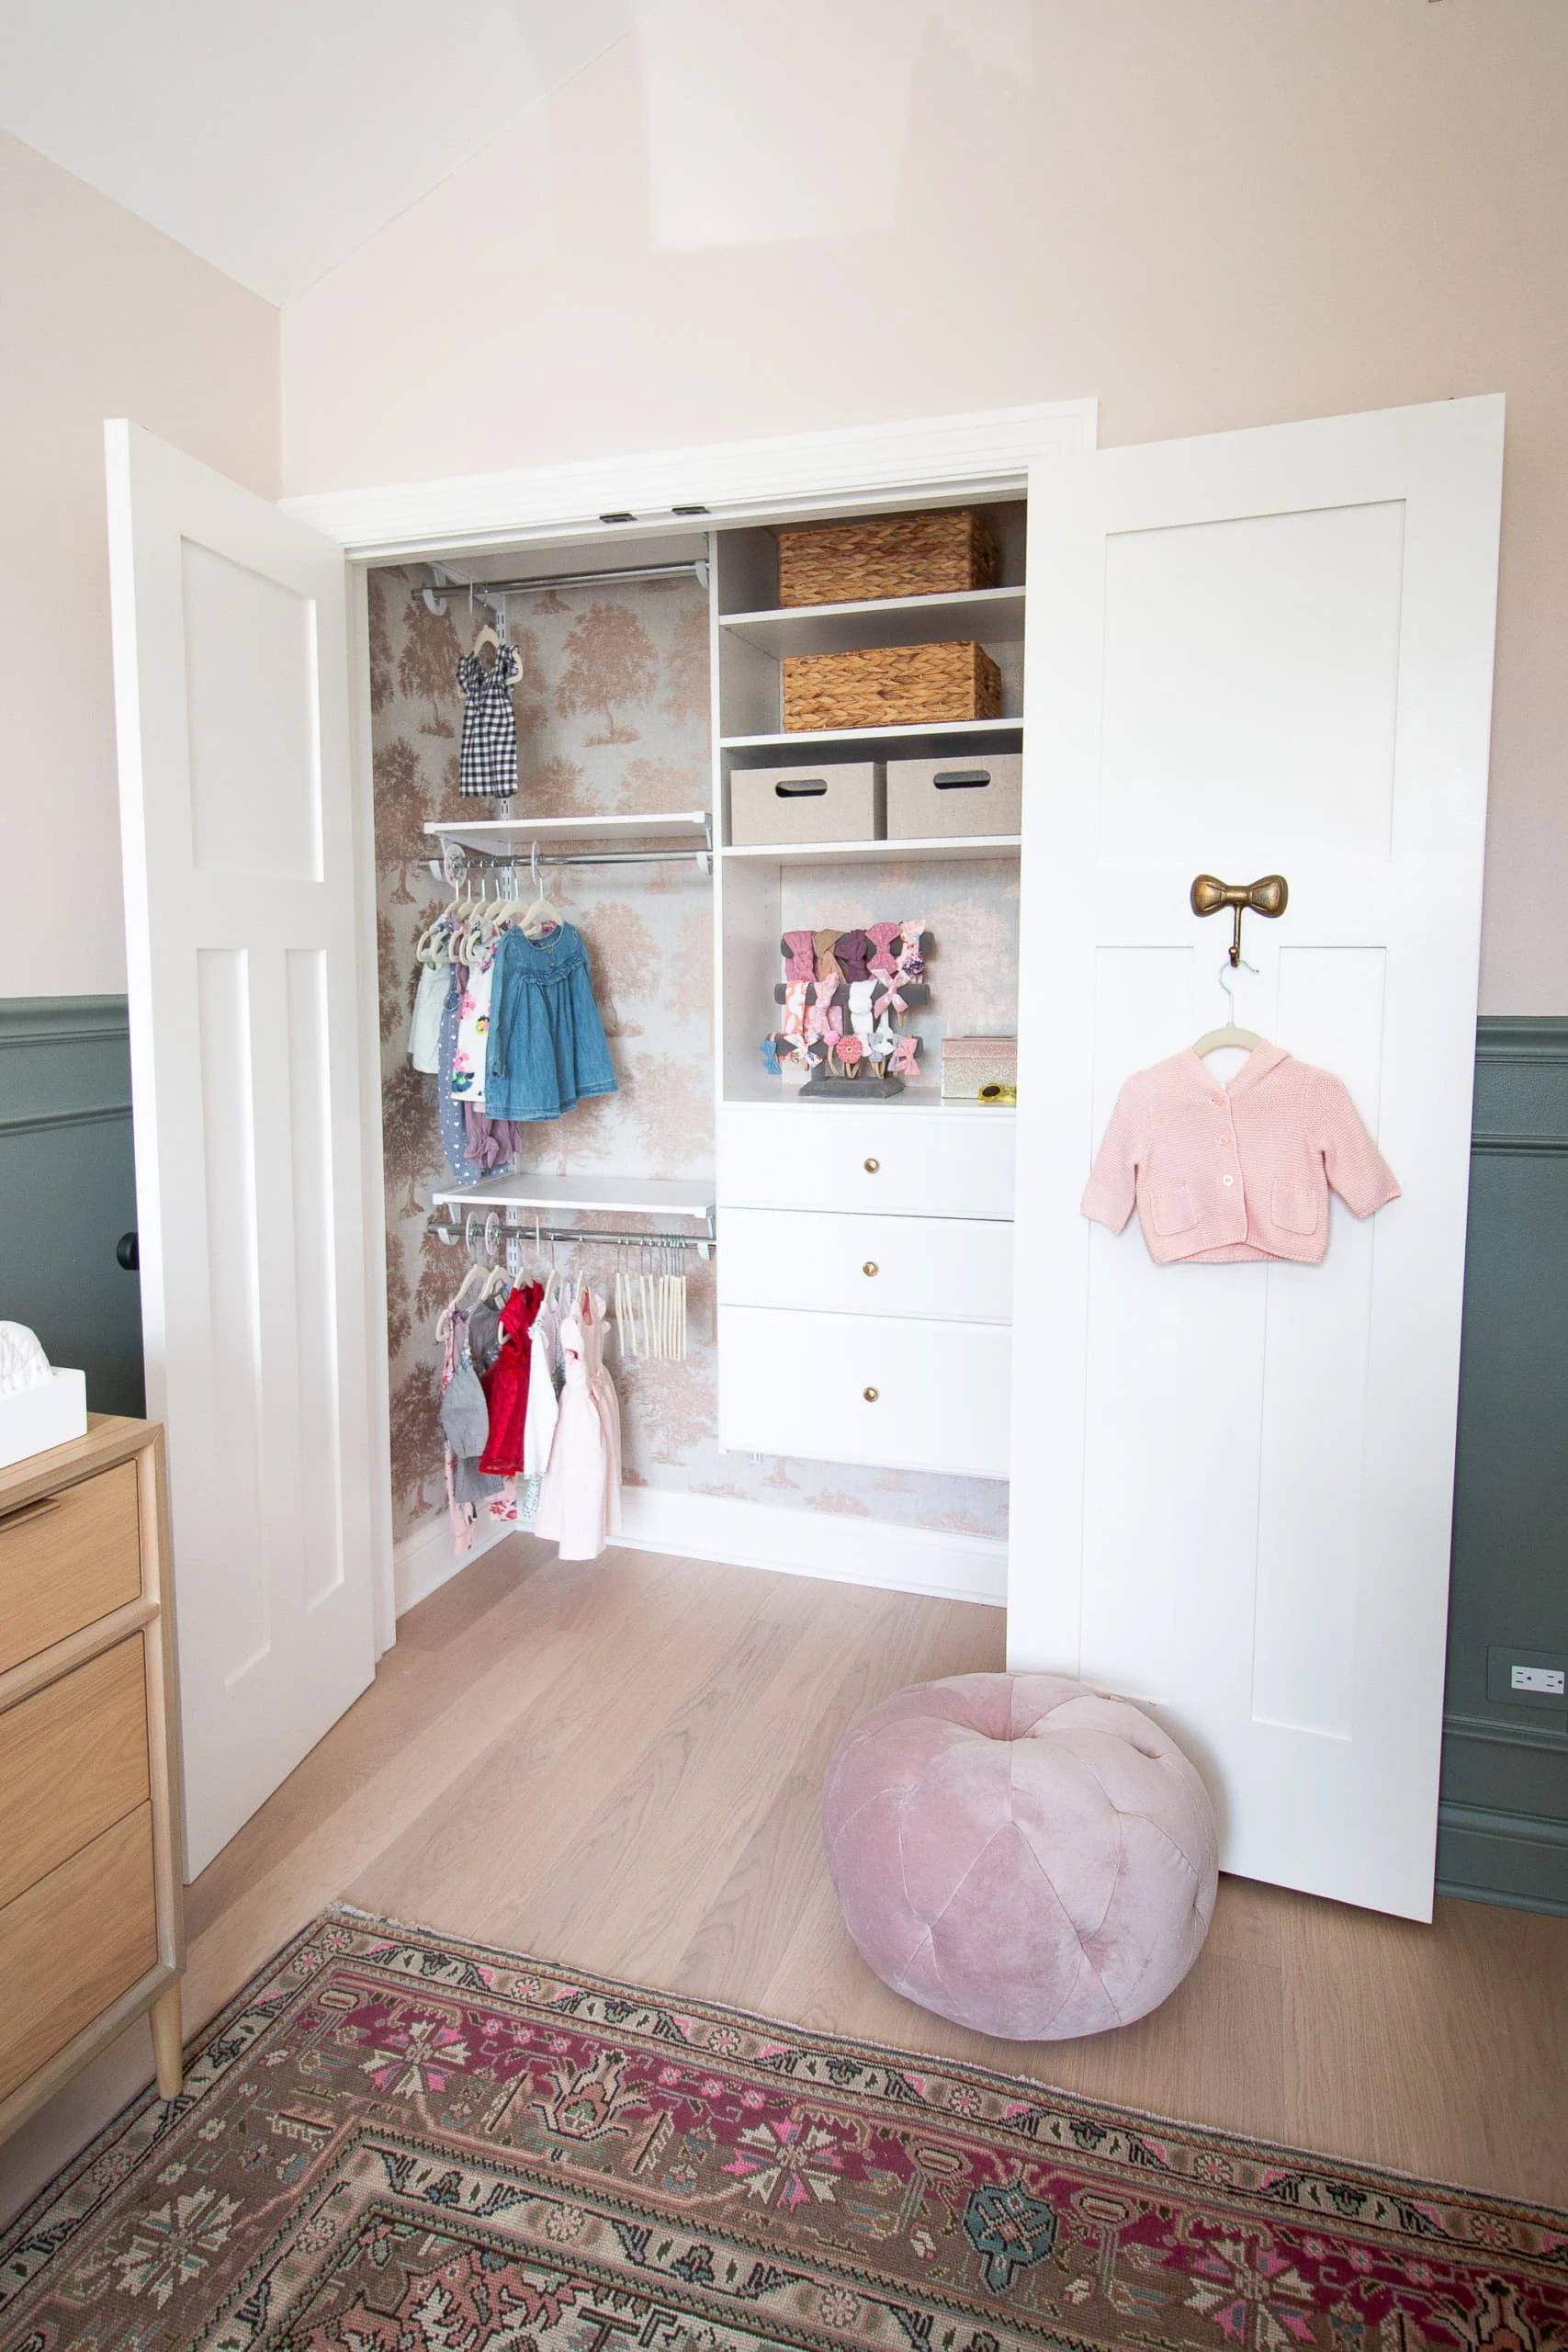
And if you're looking for another wallpaper project, I used "real" wallpaper in my daughter'south nursery closet. Y'all tin can read all virtually that process right here.
Casey

Source: https://thediyplaybook.com/install-peel-and-stick-wallpaper/
Posted by: smiththavis.blogspot.com
0 Response to "How To Install Self Adhesive Vinyl Wallpaper"
Post a Comment